Backstory, If You Will
Why do I want to build a home lab / media server?

Mostly to pad my resume and play around with technology I haven’t had much exposure to yet. However, given today’s climate around streaming services and cloud storage, I suspect that at some point my home lab may actually have a financial benefit. Or it won’t — depending on how much money I sink into this just because I can.
There was also a time when I had a slightly more altruistic thought. I wanted to build something with a touchscreen interface for my son, who is 17, has Down syndrome, and absolutely loves movies and music. That idea may still happen, just a little further down the line. First things first: get the ball rolling, then get lofty.
STEP ONE
There probably won’t be a perfectly linear set of steps, but I’ll do my best to document things as I go.
-
First, I needed to acquire the hardware for this project. To do that, I bought my wife a new MacBook Air and reclaimed her Dell Inspiron 17 7786.
-
Next, I took inventory of the hardware it came with and decided what needed upgrading. Part of that process involved troubleshooting the Intel Wireless-AC 9560. We previously couldn’t get it working after a Windows OS reset, so we had been using a TP-Link Wi-Fi dongle as a workaround until I could replace the internal card.
- I replaced the factory-installed Intel Optane NVMe SSD with a Samsung 990 EVO Plus 1TB SSD (and even reused the thermal strip from the Optane drive).
- Another 16GB DDR4 stick of RAM was added, bringing total RAM to 32GB.
- At some point I’ll be replacing the Wi-Fi card, until then the TP-Link dongle saves the day.
- I briefly considered purchasing a SATA SSD, but instead decided to repurpose a 1TB HDD that as additional internal storage.
STEP TWO
Still with me?
After removing the Optane NVMe drive, I considered formatting it and throwing it into an enclosure for extra storage. After sitting on that idea for a bit, I decided to leave it untouched in case I ever need to fall back to a fully imaged Windows OS drive.
-
If the interwebz are to be believed, the next step was to go into the BIOS and switch SATA Operation from RAID On to AHCI. Other configurations mentioned online didn’t apply to this particular laptop.
- Next up: creating a bootable USB drive. Since this was a blank NVMe drive, the installation should have been straightforward. But let’s be honest — in IT, anything can go sideways. Expect nothing; prepare for everything. I followed the instructions provided on the Ubuntu website.
- Admittedly, I was convinced I was about to break something right up until I saw the language selection screen.
- Admittedly, I was convinced I was about to break something right up until I saw the language selection screen.
- OK, so you have Ubuntu installed, loaded and ready to roll, now what? Extra storage! I ended up repurposing an old 1TB HDD.
- Since this HDD had previously been bootable and contained an operating system, the laptop was caught in a boot loop and emitted some very concerning beeps. I had to boot from the Ubuntu USB again, enter recovery mode, and reformat the HDD properly before it could be used as storage.
STEP THREE
-
The first real step toward turning this laptop into a media server was installing Docker and Docker Compose.
- Docker is a container platform. In simple terms, containers are self-contained environments that bundle software together with everything it needs to run — configuration files, libraries, dependencies, the whole deal. This helps eliminate the classic “but it works on my computer” problem.
- Docker Compose is the tool that manages multiple Docker containers at once. Instead of manually spinning up containers one by one, Docker Compose handles that complexity for you. One command and — voilà — everything comes online.
- Next, I set up a local Git repository and created a corresponding GitHub repository to sync it with.
- Git vs. GitHub, in plain English:
- Git lives on your computer. GitHub is a website/service.
- Git is a version control system. Think of it like save points in a video game. Each commit is a checkpoint you can safely return to if something goes sideways.
- If you feel froggy, you can branch off from those save poins in your Git to experiment without risking the main project.
- GitHub the website, allows you to back up your Git commits “to the cloud”.
- GitHub enables collaboration, sharing, and contribution from others.
- And that’s just scratching the surface — GitHub offers a lot more tools worth exploring later.
- Git vs. GitHub, in plain English:
- Finally, it was time to play with Jellyfin.
- This started with creating a Docker container for Jellyfin.
- After confirming Docker was running, I used the terminal to build out the directory structure.
- Then came the
docker-compose.ymlfile. - Once that was configured, I started the container, which pulled the Jellyfin image from Docker Hub.
Note: That’s how it’s supposed to go, anyway. Spoiler alert: it didn’t.
- I had to backtrack and fix my directory structure, delete some folders, and move others around.
- Then, when I finally tried accessing Jellyfin in the browser… nothing. Turns out indentation in
docker-compose.ymlreally matters. I knew that — but copy-paste intonanoapparently had other plans. Reacquainting myself with Linux commands has been… character building. Once that was corrected, then…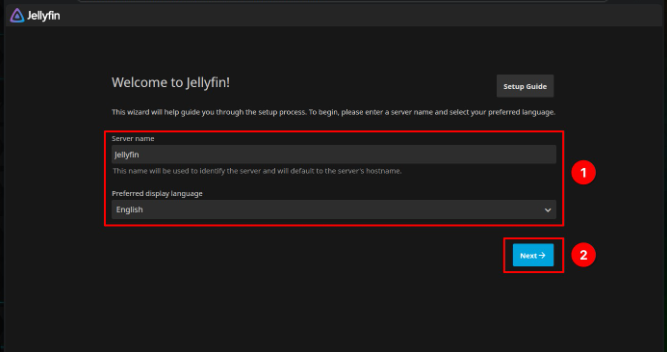
Note 2: When setting up Jellyfin for the first time, REMEMBER YOUR ADMIN LOG IN!!! Or write it down. Otherwise, you’ll have to blow away the docker and recreate it.

Conclusion: Or Is It
Since I’ve been trying to write this blog post for over 10 days now, while following along with the homelab set up, I figured I’d go ahead of just post this as a starting point to a continuing thing and just give updates and whatnot, as they come. Let me know what you think, either via LinkedIn, or the comment box down below.
If you’d like to support my work, you can donate via PayPal.